Avvertenza - Faber HOO-B BK/A A52 - Manuale d'uso - Pagina 3


Indice:
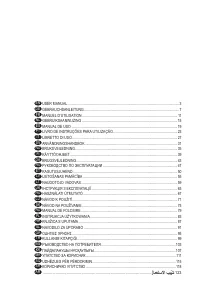
- Pagina 3 – Avvertenza
- Pagina 4 – Use
- Pagina 5 – Empfehlungen und hinweise; werden, damit der Rückfluss der
- Pagina 6 – Gebrauch
- Pagina 7 – Conseils et suggestions
- Pagina 8 – Utilisation
- Pagina 9 – Adviezen en suggesties; kenmerken die niet over uw specifieke
- Pagina 10 – Gebruik
- Pagina 11 – Consejos y sugerencias; garantizarse un grado suficiente de
- Pagina 12 – Uso; Nunca utilice la campana para fines; Mantenimiento
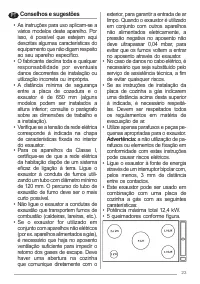
- Pagina 13 – Conselhos e sugestões
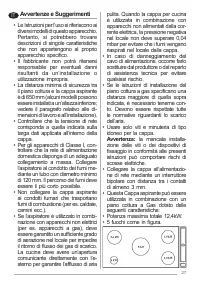
- Pagina 15 – Avvertenze e Suggerimenti
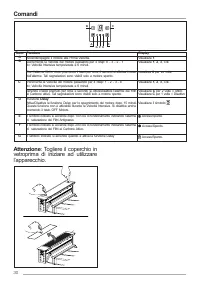
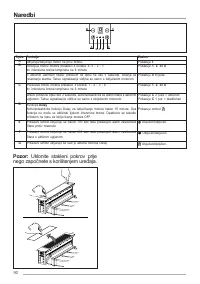
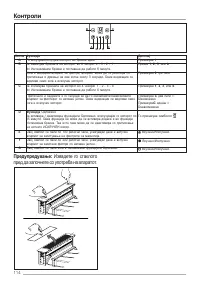
- Pagina 18 – Comandi; Attenzione; : Togliere il coperchio in
- Pagina 19 – Rekommendationer och tips
- Pagina 20 – Användning
- Pagina 21 – Anbefalinger og forslag; finne beskrivelser av enkelte egen; bluss som vist på figuren.
- Pagina 22 – bluss som vist på figuren.; Bruk; flammen kun dekker grytebunnen; Vedlikehold
- Pagina 23 – Ohjeet ja suositukset
- Pagina 24 – Käyttö
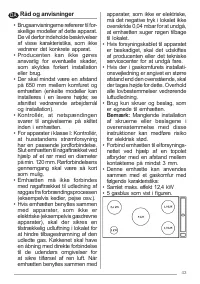
- Pagina 25 – Råd og anvisninger; gasblus som vist i figuren.
- Pagina 26 – gasblus som vist i figuren.; gasblus som vist i figuren.; Anvendelse; flammer under emhætten, når
- Pagina 27 – Эксплуатация
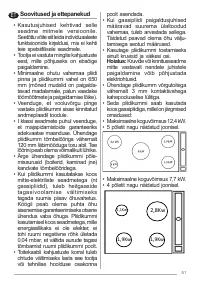
- Pagina 28 – Soovitused ja ettepanekud; teie spetsiifilisele seadmele.
- Pagina 29 – Kasutamine; Ärge pliidikummi all flambeerige –
- Pagina 30 – Ieteikumi un priekšlikumi; atstarpe ir vismaz 3 mm.
- Pagina 31 – Izmantošana
- Pagina 32 – Patarimai ir nuorodos
- Pagina 33 – Naudojimas
- Pagina 34 – Використання
- Pagina 35 – Használat
- Pagina 36 – Použití; nešlehal po jejích stranách.
- Pagina 37 – Použitie
- Pagina 38 – Utilizarea; exclusiv pentru uz casnic, având
- Pagina 39 – Uwagi i sugestie
- Pagina 40 – Użytkowanie
- Pagina 41 – Savjeti i preporuke
- Pagina 42 – Uporaba
- Pagina 44 – Priporočila in nasveti
- Pagina 46 – Χρηση
- Pagina 47 – Tavsiyeler ve öneriler
- Pagina 48 – Kullanim; • Ürün üstündeki veya paketindeki
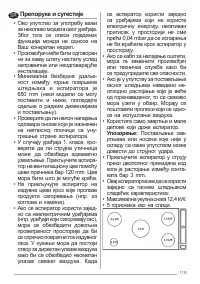
- Pagina 49 – Употреба
- Pagina 50 – Кеңестер мен ұсыныстар
- Pagina 51 – Пайдалану
- Pagina 52 – Совети и трикови; MK
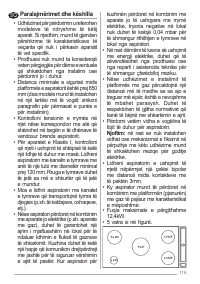
- Pagina 56 – Paralajmërimet dhe këshilla; paragrafin për përmasat e punës e; SQ
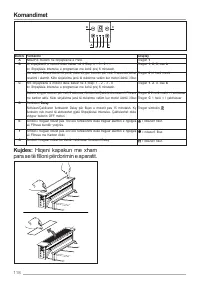
- Pagina 57 – Përdorimi
- Pagina 60 – Препоруке и сугестије
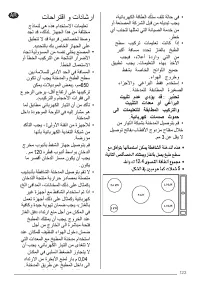
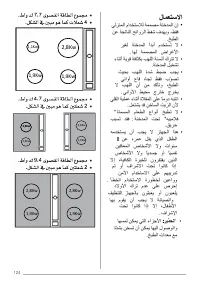
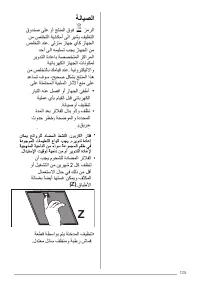
- Pagina 63 – لامعتسلاا; ريذحت; ةنايصلا
3
Recommendations
and suggestions
• The Instructions for Use apply to
several versions of this appliance.
Accordingly, you may find descriptions
of individual features that do not apply
to your specific appliance.
• The manufacturer will not be
held liable for any damages
resulting from incorrect or improper
installation.
• The minimum safety distance
between the cooker top and the
extractor hood is 650 mm (some
models can be installed at a
lower height, please refer to the
paragraphs on working dimensions
and installation).
• Check that the mains voltage
corresponds to that indicated on
the rating plate fixed to the inside
of the hood.
• For Class I appliances, check
that the domestic power supply
guarantees adequate earthing.
Connect the extractor to the
exhaust flue through a pipe of
minimum diameter 120 mm. The
route of the flue must be as short
as possible.
• Do not connect the extractor
hood to exhaust ducts carrying
combustion fumes (boilers,
fireplaces, etc.).
• If the extractor is used in conjunction
with non-electrical appliances
(e.g. gas burning appliances),
a sufficient degree of aeration
must be guaranteed in the room
in order to prevent the backflow
of exhaust gas. The kitchen must
have an opening communicating
directly with the open air in order
to guarantee the entry of clean air.
When the cooker hood is used
in conjunction with appliances
supplied with energy other than
electric, the negative pressure in
the room must not exceed 0,04
mbar to prevent fumes being
drawn back into the room by the
cooker hood.
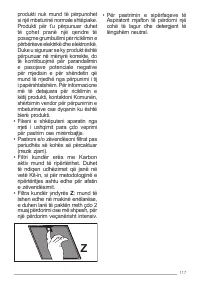
• In the event of damage to the
power cable, it must be replaced
by the manufacturer or by the
technical service department, in
order to prevent any risks.
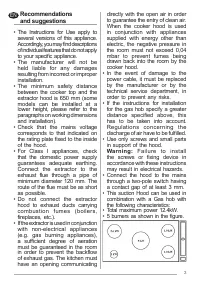
• If the instructions for installation
for the gas hob specify a greater
distance specified above, this
has to be taken into account.
Regulations concerning the
discharge of air have to be fulfilled.
• Use only screws and small parts
in support of the hood.
Warning:
Failure to install
the screws or fixing device in
accordance with these instructions
may result in electrical hazards.
• Connect the hood to the mains
through a two-pole switch having
a contact gap of at least 3 mm.
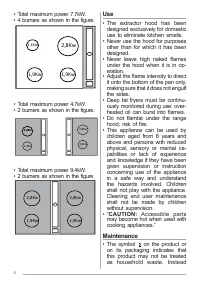
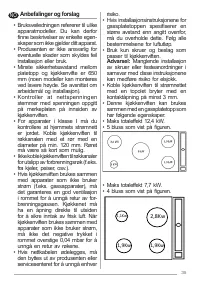
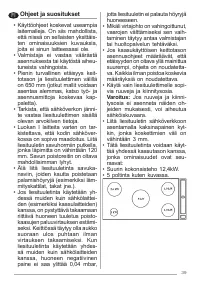
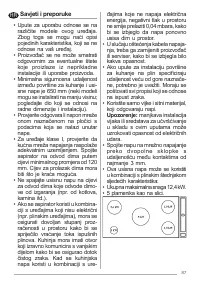
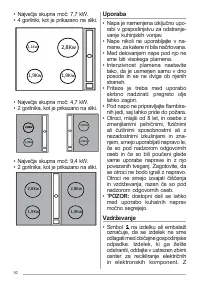
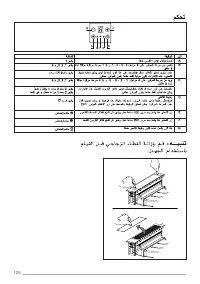
• This suction Hood can be used in
combination with a Gas hob with
the following characteristics:
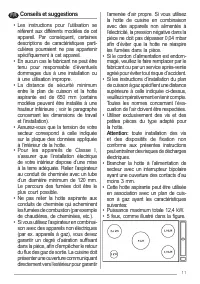
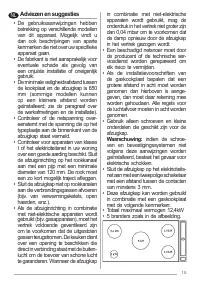
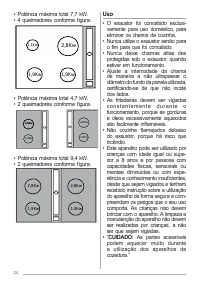
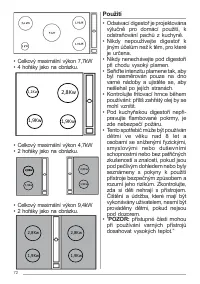
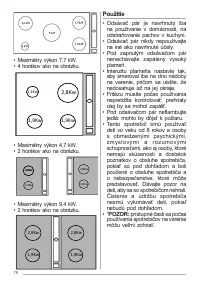
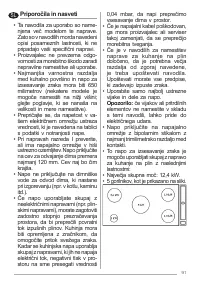
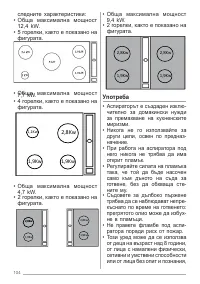
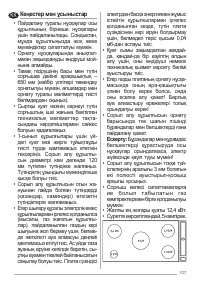
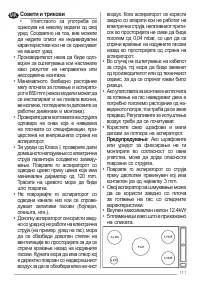
• Total maximum power 12.4kW.
•
5 burners as shown in the figure.
3
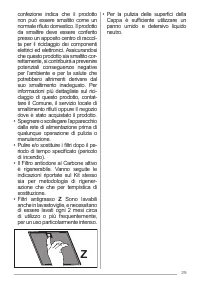
• Se le istruzioni di installazione del piano cottura a gas specificano una
distanza maggiore di quella sopra indicata, è necessario tenerne conto.
Devono essere rispettate tutte le normative riguardanti lo scarico dell'aria.
• Usare solo viti e minuteria di tipo idoneo per la cappa.
Avvertenza
: la mancata installazione delle viti o dei dispositivi di fissaggio
in conformità alle presenti istruzioni può comportare rischi di scosse
elettriche.
• Collegare la cappa all'alimentazione di rete mediante un interruttore
bipolare con distanza tra i contatti di almeno 3 mm.
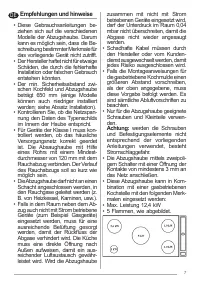
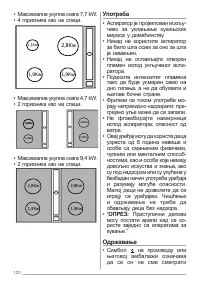
• Questa cappa aspirante può essere utilizzata in combinazione con un
piano cottura a gas dotato delle seguenti caratteristiche:
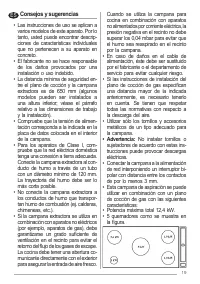
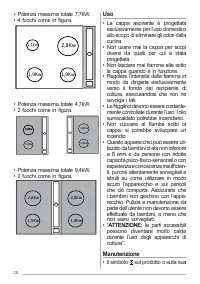
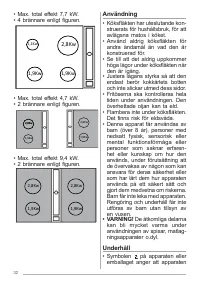
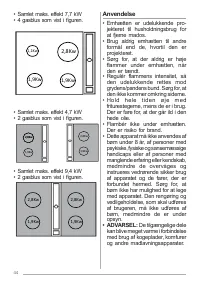
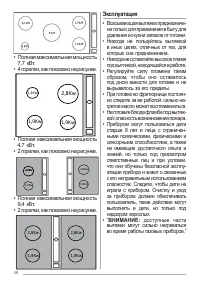
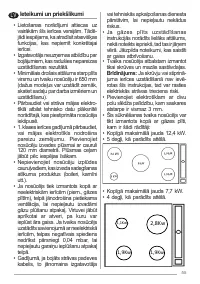
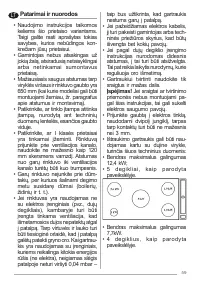
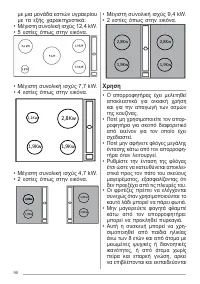
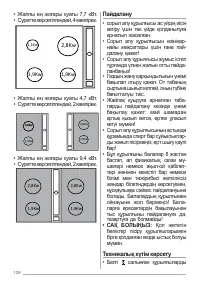
• Potenza massima totale 12,4 kW
• 5 fuochi come illustrato nella figura
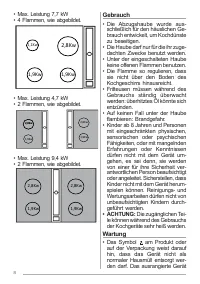
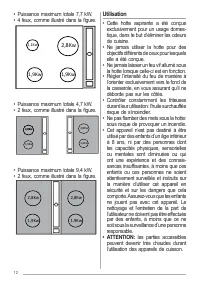
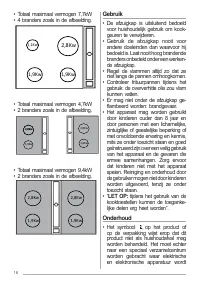
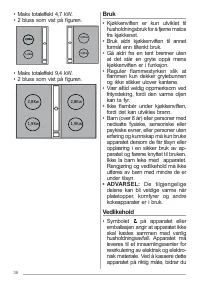
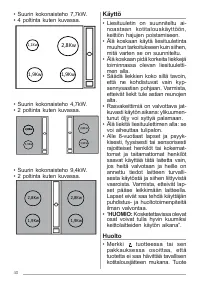
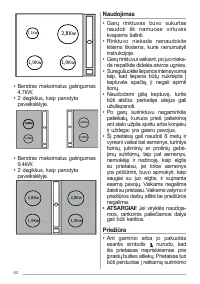
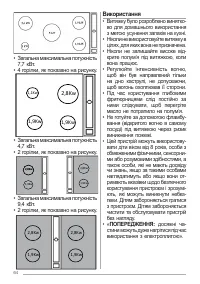
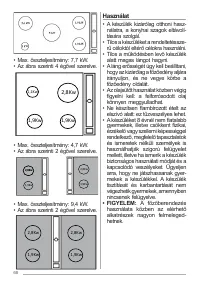
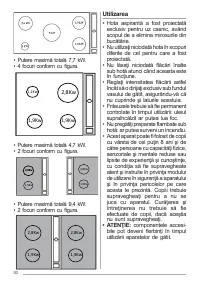
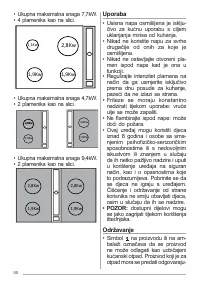
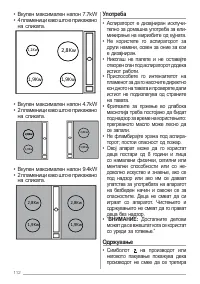
• Potenza massima totale 7,7 kW
• 4 fuochi come illustrato nella figura
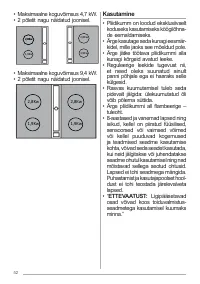
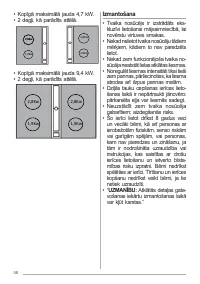
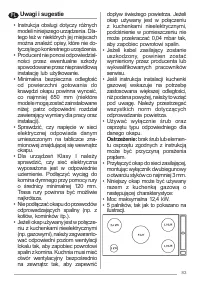
• Potenza massima totale 4,7 kW
• 2 fuochi come illustrato nella figura
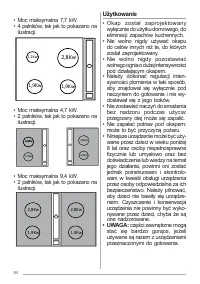
• Potenza massima totale 9,4 kW
• 4 fuochi come illustrato nella figura
2,8Kw
2,8Kw
1,9Kw
2,8Kw
1,9Kw
2,8Kw
1,9Kw
2,8Kw
1,9Kw
2,8Kw
1,9Kw
1,9Kw
1,1Kw
Oppure
EN
"Caricamento dell'istruzione" significa che è necessario attendere finché il file non è caricato e pronto per la lettura online. Alcune istruzioni sono molto grandi e il tempo di caricamento dipende dalla velocità della tua connessione a Internet.
Sommario
3 Recommendations and suggestions • The Instructions for Use apply to several versions of this appliance. Accordingly, you may find descriptions of individual features that do not apply to your specific appliance. • The manufacturer will not be held liable for any damages resulting from incorrect o...
4 • Total maximum power 7.7kW. • 4 burners as shown in the figure. 3 • Se le istruzioni di installazione del piano cottura a gas specificano una distanza maggiore di quella sopra indicata, è necessario tenerne conto. Devono essere rispettate tutte le normative riguardanti lo scarico dell'aria. • Usa...
7 Empfehlungen und hinweise • Diese Gebrauchsanleitungen be- ziehen sich auf die verschiedenen Modelle der Abzugshaube. Darum kann es möglich sein, dass die Be- schreibung bestimmter Merkmale für das vorliegende Gerät nicht zutrifft. • Der Hersteller haftet nicht für etwaige Schäden, die durch die f...
Altri modelli di cappe da cucina Faber
-
 Faber 741 BASE BK A60
-
 Faber 741 BASE BK A60 EXP
-
 Faber 741 BASE W A50
-
 Faber 741 BASE W A50 FB EXP
-
 Faber 741 BASE W A60
-
 Faber 741 BASE X A50
-
 Faber 741 BASE X A50 FB EXP
-
 Faber 741 BASE X A60
-
 Faber 741 BASE X A60 FB EXP
-
 Faber 741 PB W A50