REGOLAZIONE DEL MINIMO; - Accendere un bruciatore e portare la manopola; COMANDI FRONTALI; Set the idle mode on each burner one at a; ) when rotating the knobs immediately from the - Barazza LABH900-3NG - Manuale d'uso - Pagina 12
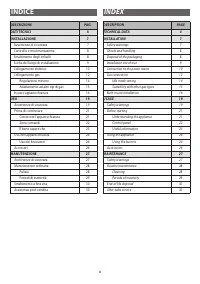


Indice:
- Pagina 2 – DESCRIZIONE
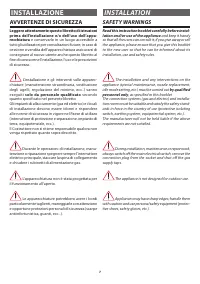
- Pagina 5 – SAFET Y WARNINGS; and keep it handy; by qualified; During installation, maintenance or repair work,; INSTALLAZIONE; AVVERTENZE DI SICUREZZA; e conservarlo in un luogo accessibile a; solo da personale qualificato; secondo
- Pagina 6 – CHECKS AND HANDLING; and; DISPOSAL OF THE PACKAGING; instructions bag; CONTROLLO E MOVIMENTAZIONE; Composizione imballo:
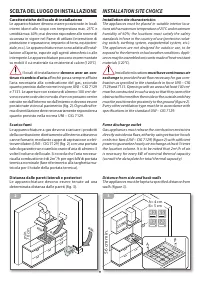
- Pagina 7 – SCELTA DEL LUOGO DI INSTALLAZIONE; Caratteristiche del locale di installazione; I locali di installazione; tinuo ricambio d’aria; affinchè possa sempre affluire; Scarico fumi; con una portata; Distanza dalle pareti laterali e posteriori; AIR; INSTALLATION SITE CHOICE; Installation site characteristics; Installation locations; must have continuous air; to provide the air flow necessary for gas com-; Fume discharge outlet; with sufficient; Distance from side and back walls
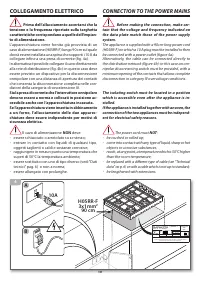
- Pagina 8 – CONNECTION TO THE POWER MAINS; Before making the connection, make cer-; The power cord must; NOT; objects or corrosive substances; COLLEGAMENTO ELETTRICO; Prima dell’allacciamento accertarsi che la
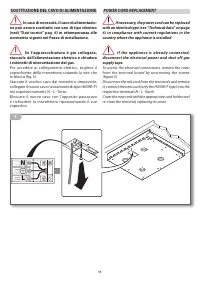
- Pagina 9 – SOSTITUZIONE DEL CAVO DI ALIMENTAZIONE; In caso di necessità, il cavo di alimentazio-; POWER CORD REPLACEMENT; If necessary, the power cord can be replaced
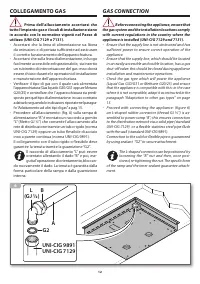
- Pagina 10 – COLLEGAMENTO GAS; Prima dell’allacciamento accertarsi che; - Accertarsi che la linea di alimentazione sia libera; GAS CONNECTION; Before connecting the appliance, ensure that; - Ensure that the supply line is not obstructed and has
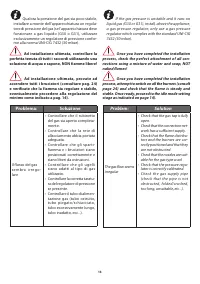
- Pagina 11 – Qualora la pressione del gas sia poco stabile,; Ad installazione ultimata, controllare la; If the gas pressure is unstable and it runs on; Once you have completed the installation; Soluzione; t $IFDLUIBUUIFHBTUBQJTGVMMZ
- Pagina 12 – REGOLAZIONE DEL MINIMO; - Accendere un bruciatore e portare la manopola; COMANDI FRONTALI; Set the idle mode on each burner one at a; ) when rotating the knobs immediately from the
- Pagina 13 – . In the case where you carry out an appliance
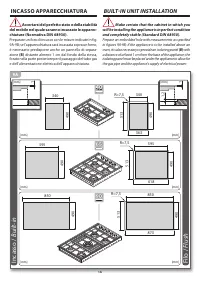
- Pagina 14 – INCASSO APPARECCHIATURA; Accertarsi del perfetto stato e della stabilità; Preparare un foro di incasso con le misure indicate in; lush; BUILT-IN UNIT INSTALLATION; Make certain that the cabinet in which you; if the appliance is to be installed above an
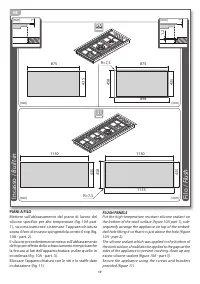
- Pagina 15 – PIANI A FILO; , successivamente sistemare l’apparecchiatura; FLUSH PANELS; figure 10A part 1)
- Pagina 17 – PER UN USO CORRETTO E SICURO; Questa apparecchiatura è stata concepita e; Pericolo di incendio!; FOR SAFE AND CORRECT USE
- Pagina 18 – PER LA COTTURA; Pericolo di scottature!; FOR COOKING
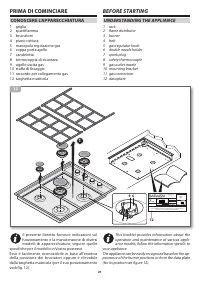
- Pagina 19 – BEFORE STARTING; UNDERSTANDING THE APPLIANCE; PRIMA DI COMINCIARE; CONOSCERE L’APPARECCHIATURA; specifiche per il modello in Vostro possesso.
- Pagina 21 – È BENE SAPERE CHE; tenzione ordinaria” di pag. 28; USEFUL INFORMATION; Routine
- Pagina 22 – USO DEI BRUCIATORI; Prima dell’utilizzo verificare che gli spar-; . La termocoppia è un dispositivo; Accensione dei bruciatori; la manopola corrispon-; contemporaneamente ruotarla; fino al simbolo; secondi; e 2) tenendo premuta più a lungo la; USING THE BURNERS; USO DELL’APPARECCHIATURA
- Pagina 23 – ) Posizionate i tegami per la cottura sul bruciatore; Bruciatore; Per un maggiore risparmio energetico è consiglia-; Accer tarsi che i recipienti di cottura; quently rotate the knob to the desired position (MIN; Cooking; ) Place the pan on the lit burner: do not leave burners on; Burner; For maximum energy saving, we recommend cooking; Ensure that the food containers sit correctly
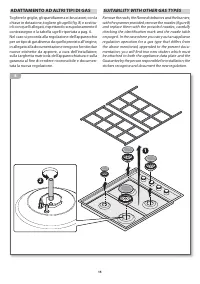
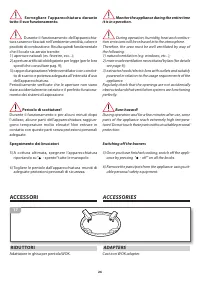
- Pagina 24 – Durante il funzionamento dell’apparecchia-; ) A cottura ultimata, spegnere l’apparecchiatura; Monitor the appliance during the entire time; ACCESSORIES; RIDUTTORI; Adattatore in ghisa per pentola WOK.; ADAPTERS
- Pagina 25 – Spegnere sempre l’interruttore elettrico; Una volta che i componenti dell’apparecchia-; Always disconnect the appliance from the; After each use, once the appliance components; MANUTENZIONE
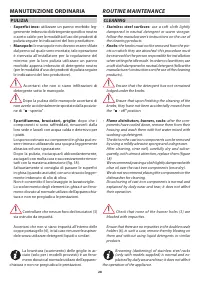
- Pagina 26 – MANUTENZIONE ORDINARIA; PULIZIA; Dopo la pulizia, risciacquarli abbondantemente,; ROUTINE MAINTENANCE; CLEANING; Stainless steel sur faces:
- Pagina 27 – Dopo la pulizia accertarsi di aver rimontato; PERIODI DI INATTIVIT; t FGGFUUVBUFVOBDDVSBUBQVMJ[JBEFMMBQQBSFDDIJBUVSB; PERIODS OF INACTIVIT Y; t UIPSPVHIMZDMFBOUIFBQQMJBODFGPMMPXJOHUIFJOTUSVD
- Pagina 28 – SMALTIMENTO A FINE VITA; Il prodotto alla fine della propria vita; Rendere inutilizzabile l’apparecchiatura per lo; ASSISTENZA POST VENDITA; F.lli Barazza Vi assicura la massima collaborazione; Procedura in caso di malfunzionamento; t WFSJGJDBSFDIFDJTJBDPSSFOUFFMFUUSJDB; Attenzione! In attesa della risoluzione del; Before disposing of the appliance, render it unus-; Procedure to follow if your appliance is malfunctioning; t DIFDLUIBUUIFBQQMJBODFJTTVQQMJFEXJUIQPXFS; Attention! While waiting for resolution of the
14
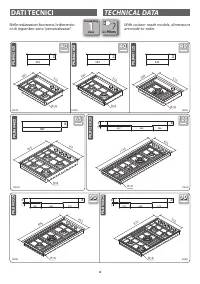
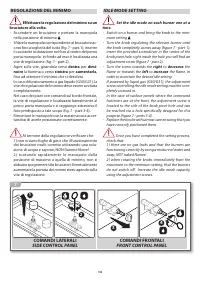
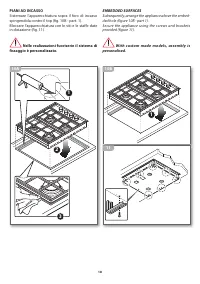
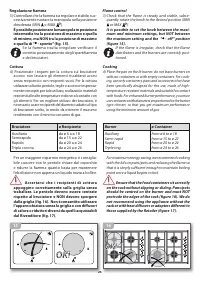
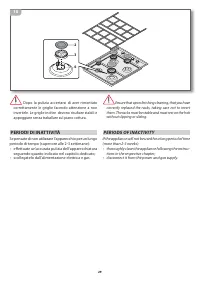
REGOLAZIONE DEL MINIMO
Effettuare la regolazione del minimo su un
bruciatore alla volta.
- Accendere un bruciatore e portare la manopola
nella posizione di minimo .
- Sfilare la manopola corrispondente al bruciatore ac-
ceso fino a toglierla del tutto
(fig. 7 - part.1)
; inserire
il cacciavite in dotazione nel foro al centro del perno
porta manopola: in fondo ad esso è localizzata una
vite di regolazione
(fig. 7 - part.2)
.
- Agire sulla vite, girandola verso
destra
per
dimi-
nuire
la fiamma o verso
sinistra
per
aumentarla
,
fino ad ottenere il minimo che si desidera.
In caso di funzionamento a gas liquido (G30/G31), la
vite di regolazione del minimo deve essere avvitata
completamente.
Nel caso dei piani con comandi sul bordo frontale,
la vite di regolazione è localizzata lateralmente al
perno porta manopola e si raggiunge attraverso il
foro predisposto a tale scopo
(fig. 7 - part.3-4)
.
- Rimontare le manopole con la massima cura accer-
tandosi di averle posizionate correttamente.
Al termine della regolazione verificare che:
1) non vi siano fughe di gas e che il funzionamento
dei bruciatori risulti corretto utilizzando una solu-
zione di acqua e sapone, NON fiamme libere!
2 ) r u o t a n d o ra p i d a m e nte l e m a n o p o l e d a l l a
posizione di massimo a quella di minimo, non si
abbiano spegnimenti dei bruciatori. Eventualmente
aumentare la portata dei minimi stessi agendo sulla
vite di regolazione.
3
4
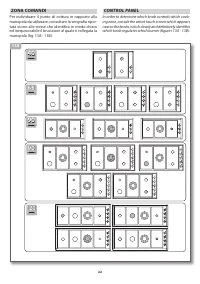
COMANDI FRONTALI
COMANDI LATERALI
FRONT CONTROL PANEL
SIDE CONTROL PANEL
1
2
7
IDLE MODE SETTING
Set the idle mode on each burner one at a
time.
- Switch on a burner and bring the knob to the mini-
mum setting .
- Turn the knob regulating the relevant burner until
the knob completely comes away
(figure 7 - part 1)
;
insert the provided screwdriver in the centre of the
knob pivot hole: right inside the hole you will find an
adjustment screw
(figure 7 - part 2)
.
- Turn the screw towards the
right
to
decrease
the
flame or towards the
left
to
increase
the flame, in
order to ascertain the desired idle setting.
If powered by liquid gas (G30/G31), the adjustment
screw controlling the idle mode setting must be com-
pletely screwed in.
In the case of surface panels where the command
functions are at the front, the adjustment screw is
located to the side of the knob pivot hole and can
be reached via a hole specifically designed for this
purpose
(figure 7 - parts 3-4)
.
- Replace the knobs with utmost care ensuring that you
have correctly positioned them.
Once you have completed the setting process,
check that:
1) there are no gas leaks and that the burners are
functioning correctly by using a mixture of water and
soap, NOT naked flames!
2) when rotating the knobs immediately from the
maximum to the minimum setting, that the burners
do not switch off. Increase the idle mode capacity
using the adjustment screws.
"Caricamento dell'istruzione" significa che è necessario attendere finché il file non è caricato e pronto per la lettura online. Alcune istruzioni sono molto grandi e il tempo di caricamento dipende dalla velocità della tua connessione a Internet.
Sommario
3 INDICE INDEX DESCRIZIONE PAG. DATI TECNICI 4 INSTALLAZIONE 7 Avvertenze di sicurezza 7 Controllo e movimentazione 8 Smaltimento degli imballi 8 Scelta del luogo di installazione 9 Collegamento elettrico 10 Collegamento gas 12 Regolazione minimo 14 Adattamento ad altri tipi di gas 15 Inc...
7 SAFET Y WARNINGS Read this instruction booklet carefully before instal-lation and/or use of the appliance and keep it handy so that all the users can consult it; if you give away or sell the appliance, please ensure that you give this booklet to the new user so that he can be informed about its in...
8 CHECKS AND HANDLING After having unpacked the appliance and removed all the packing materials and protective films from the sur-faces, check for any anomalies: if you find an anomaly, do not proceed with the installation but contact your retailer within 8 days, reporting the data provided on the a...
Altri modelli di piani di cottura Barazza
-
 Barazza 1PIDC120N
-
 Barazza 1PIDC30N
-
 Barazza 1PIDC60N
-
 Barazza 1PIDC80N
-
 Barazza 1PIDC90N
-
 Barazza 1PIDG64B
-
 Barazza 1PIDG64N