Indesit VRA 640 C S/X S - Manuale d'uso - Pagina 5


Indice:
- Pagina 7 – Questo prodotto soddisfa i requisiti imposti dalla nuova; Descrizione dell’apparecchio; Opis urz; Panel sterowania; łą
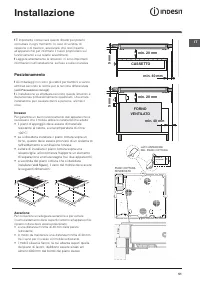
- Pagina 8 – Installazione; Posizionamento; Incasso; vedi fi gure; Aerazione; CASSETTO
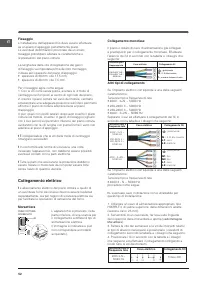
- Pagina 9 – Fissaggio; Collegamento elettrico; Morsettiera
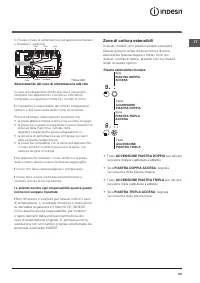
- Pagina 10 – L’azienda declina ogni responsabilità qualora queste; Zone di cottura estensibili; vedi Avvio e utilizzo
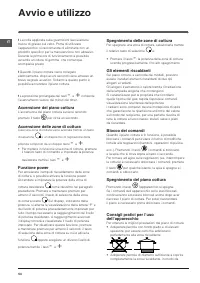
- Pagina 11 – Avvio e utilizzo
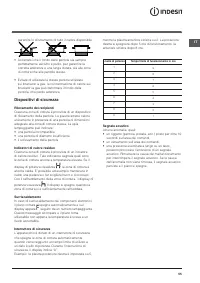
- Pagina 12 – Dispositivi di sicurezza; Rilevamento dei recipienti; Segnale acustico
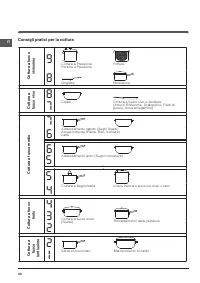
- Pagina 13 – Consigli pratici per la cottura
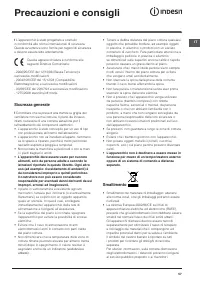
- Pagina 14 – Precauzioni e consigli; Sicurezza generale; L’apparecchio deve essere usato per cuocere; vedi Avvio e; L’apparecchio non è destinato a essere messo in; Smaltimento
- Pagina 15 – Manutenzione e cura; Escludere la corrente elettrica; Telaio in acciaio inox; Smontare il piano
GB
7
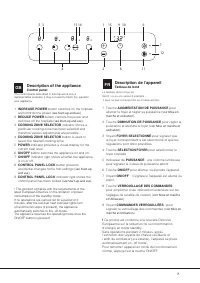
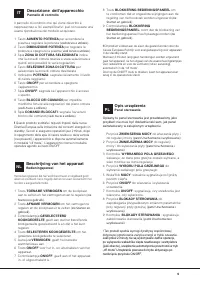
Description of the appliance
Control panel
GB
Description de l’appareil
Tableau de bord
FR
The control panel described in this manual is only a
representative example: it may not exactly match the panelon
your appliance.
1
INCREASE POWER
button switches on the hotplate
and controls the power (
see Start-up and use
).
2
REDUCE POWER
button controls the power and
switches off the hotplate (
see Start-up and use
).
3
COOKING ZONE SELECTOR
indicator shows a
particular cooking zone has been selected and
therefore various adjustments are possible.
4
COOKING ZONE SELECTOR
button is used to
select the desired cooking zone.
5
POWER
indicator provides a visual display for the
current heat level.
6
ON/OFF
button switches the appliance on and off.
7
ON/OFF
indicator light shows whether the appliance
is on or off.
8
CONTROL PANEL LOCK
button prevents
accidental changes to the hob settings (
see
Start-up
and use
).
9
CONTROL PANEL LOCK
indicator light shows the
control panel has been locked (
see Start-up and use
).
! This product complies with the requirements of the
latest European Directive on the limitation of power
consumption of the standby mode.
If no operations are carried out for a period of 2
minutes, after the residual heat indicator lights turn
off and the fan stops (if present), the appliance
automatically switches to the .off mode..
The appliance resumes the operating mode once the
ON/OFF button is pressed.
Le tableau de bord qui est
décrit n.a qu.une valeur d.exemple :
il peut ne pas correspondre au modèle acheté
.
1 Touche
AUGMENTATION DE PUISSANCE
pour
allumer le foyer et régler sa puissance (
voir Mise en
marche et utilisation
).
2 Touche
DIMINUTION DE PUISSANCE
pour régler la
puissance et éteindre le foyer (
voir Mise en marche et
utilisation
).
3 Voyant
FOYER SELECTIONNÉ
pour signaler que
le foyer correspondant a été sélectionné et que les
régulations sont donc possibles.
4 Touche
SÉLECTION FOYER
pour sélectionner le
foyer souhaité
5 Indicateur de
PUISSANCE
: une colonne lumineuse
pour signaler le niveau de puissance atteint.
6 Touche
ON/OFF
pour allumer ou éteindre l’appareil.
7 Voyant
ON/OFF
: il signale si l’appareil est allumé ou
éteint.
8 Touche
VERROUILLAGE DES COMMANDES
pour empêcher toute intervention extérieure sur les
réglages de la table de cuisson (
voir
Mise en marche
et Utilisation
).
9 Voyant
COMMANDES VERROUILLÉES
: pour
signaler le verrouillage des commandes (
voir Mise en
marche et Utilisation
).
!
Ce produit est conforme à la nouvelle Directive
Européenne sur la réduction de la consommation
d’énergie en mode standby.
Sans opérations pendant 2 minutes, après
l’extinction des voyants de chaleur résiduelle et
l’arrêt du ventilateur (si existants), l’appareil se place
automatiquement en „off mode”.
Pour remettre l’appareil en mode de fonctionnement
normal, appuyer sur la touche ON/OFF.
13
1
2
3
5
4
6
7
8
9 10
11
12
14
15
"Caricamento dell'istruzione" significa che è necessario attendere finché il file non è caricato e pronto per la lettura online. Alcune istruzioni sono molto grandi e il tempo di caricamento dipende dalla velocità della tua connessione a Internet.
Sommario
GB 9 IT Il pannello di controllo che qui viene descritto è rappresentato a fini esemplificativi: può non essere una esatta riproduzione del modello acquistato. 1 Tasto AUMENTO POTENZA per accendere la piastra e regolare la potenza ( vedi Avvio e utilizzo ). 2 Tasto DIMINUZIONE POTENZA per regolare l...
IT 51 Installazione ! È importante conservare questo libretto per poterlo consultare in ogni momento. In caso di vendita, di cessione o di trasloco, assicurarsi che resti insieme all’apparecchio per informare il nuovo proprietario sul funzionamento e sui relativi avvertimenti. ! Leggere attentamente...
52 IT Fissaggio L’installazione dell’apparecchio deve essere effettuata su un piano d’appoggio perfettamente piano. Le eventuali deformazioni provocate da un errato fissaggio potrebbero alterare le caratteristiche e le prestazioni del piano cottura. La lunghezza della vite di regolazione dei ganci d...
Altri modelli di piani di cottura Indesit
-
 Indesit PIM 604
-
 Indesit VEM 645 C
-
 Indesit VRA 641 D B S/D X S