Correct adjustment of the harness permits the; OPERATION; - Put on the harness and always keep both; WARNING: Carefully read the safety; OPERAZIONI PRELIMINARI - Oleo-Mac TR 111E - Manuale d'uso - Pagina 16


Indice:
- Pagina 2 – DATI TECNICI; EMAK; Lpa; TECHNICAL DATA; ВВЕДЕНИЕ; G‹R‹fi; RUS; UVODNE NAPOMENE
- Pagina 3 – ELEKTR‹KL‹ TIRPAN PARÇALARI; Нож для обрезки лески; ЧАСТИ ЭЛЕКТРОКОСЫ
- Pagina 4 – Italiano; INFORMAZIONE AGLI UTENTI; Français; USER INFORMATION
- Pagina 6 – NORME DI SICUREZZA; English; SAFETY PRECAUTIONS
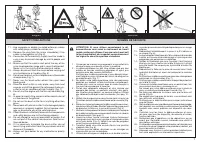
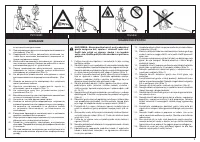
- Pagina 10 – ABBIGLIAMENTO PROTETTIVO DI SICUREZZA; SAFETY PROTECTIVE CLOTHING; . L’uso delle protezioni per l’udito richiede mag-; La; VÊTEMENTS DE PROTECTION
- Pagina 12 – ASSEMBLAGGIO; ASSEMBLY; Fissare la protezione al tubo di trasmissione tramite; ASSEMBLAGE; Fit the blade guard to the shaft arm with screws in
- Pagina 14 – continua a ruotare; - Le bouton thermique intevient automa-; ARRET; continuent; - The thermal switch stops the brushcutter
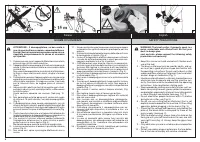
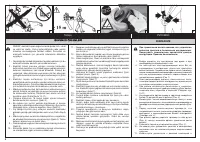
- Pagina 16 – Correct adjustment of the harness permits the; OPERATION; - Put on the harness and always keep both; WARNING: Carefully read the safety; OPERAZIONI PRELIMINARI
- Pagina 18 – ATTENZIONE - Non montare utensili di taglio me-; In order to get more line out of the cutting head, tap; WARNING - Never fi t metal cutting elements.; - Double back the line, leaving one end 10 cm longer than; ATTENTION - Ne jamais monter d’organes de coupe
- Pagina 20 – MANUTENZIONE
- Pagina 22 – CERTIFICATO DI GARANZIA; CERTIFICAT DE GARANTIE; SERIAL No
16
Italiano
Français
English
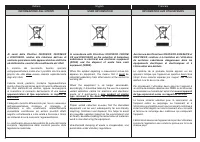
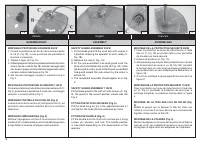
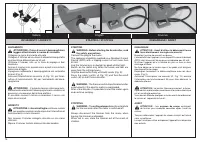
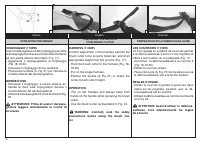
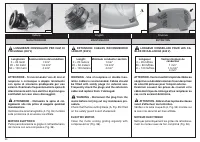
CINGHIAGGIO (1100W)
Una corretta regolazione del cinghiaggio permette
al decespugliatore di avere un buon bilanciamento
ed una adatta altezza dal terreno (Fig. 17).
- Agganciare il decespugliatore al cinghiaggio
(Fig. 18-19-20)
- Indossare il cinghiaggio di tipo semplice.
- Posizionare la fi bbia (A, Fig. 21) per ottenere la
corretta altezza del decespugliatore.
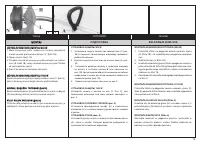
NORME D'USO
- Indossare il cinghiaggio e tenere sempre en-
trambe le mani sulle impugnature durante il
funzionamento del decespugliatore.
- Utilizzare il decespugliatore come illustrato in Fig.
22.
ATTENZIONE: Prima di usare il decespu-
gliatore leggere attentamente le norme di
sicurezza.
LES COURROIES (1100W)
Un bon réglage du système de courroies permet
à la débroussailleuse d'avoir un bon équilibre et
d'être à une hauteur du sol adéquate (Fig. 17).
- Accrochez la débroussailleuse à la courroie à
(Fig. 18-19-20).
- Enfi lez la courroie simple.
- Placez la boucle (A, Fig. 21) de manière à ce que
la débroussailleuse soit à la bonne hauteur.
REGLES D'USAGE
- Enfi lez la courroie et gardez toujours les deux
mains sur les poignées pendant que la dé-
broussailleuse est en marche.
- Utilisez la débroussaillesuse comme il est illustré
à la Fig. 22.
ATTENTION: Avant d'utiliser la débrous-
sailleuse, lisez attentivements les régles
de sécurité.
HARNESS (1100W)
Correct adjustment of the harness permits the
brush cutter to be properly balanced and at an
appropriate height from the ground (Fig. 17).
- Hook the brush cutter to the harness (Fig. 18-
19-20).
- Put on the single harness.
- Position the buckle (A, Fig. 21) to obtain the
correct brush cutter height.
OPERATION
- Put on the harness and always keep both
hands on the handle while operating the brush
cutter.
- Use the brush cutter as illustrated in Fig. 22.
WARNING: Carefully read the safety
precautions before using the brush cut-
ter.
OPERAZIONI PRELIMINARI
PREPARATION DE LA DEBROUSSAILLEUSE
PREPARING TO WORK WITH
YOUR BRUSH CUTTER
17
18
19
20
"Caricamento dell'istruzione" significa che è necessario attendere finché il file non è caricato e pronto per la lettura online. Alcune istruzioni sono molto grandi e il tempo di caricamento dipende dalla velocità della tua connessione a Internet.
Sommario
I HR INTRODUZIONE Per un corretto impiego del decespugliatore e per evitare incidenti, non iniziate il lavoro senza aver letto questo manuale con la massima attenzione. Troverete su questo ma-nuale le spiegazioni di funzionamento dei vari componenti e le istruzioni per i necessari controlli e per la...
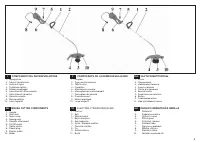
3 I 1 - Impugnatura 2 - Tubo di trasmissione 3 - Testina di nylon 4 - Protezione testina 5 - Attacco cinghiaggio 6 - Interruttore di funzionamento 7 - Interruttore di sicurezza 8 - Spina di corrente 9 - Motore elettrico10 - Lama tagliafi lo COMPONENTI DEL DECESPUGLIATORE GB 1 - Handle 2 - Shaft arm ...
4 Ai sensi delle Direttive 2002/95/CE, 2002/96/CE e 2003/108/CE, relative alla riduzione dell’uso di sostanze pericolose nelle apparecchiature elettriche ed elettroniche, nonché allo smaltimento dei rifi uti Il simbolo del cassonetto barrato riportato sull’apparecchiatura indica che il prodotto all...
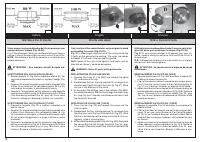
Altri modelli di tagliaerba Oleo-Mac
-
 Oleo-Mac BC 22 T
-
Oleo-Mac BC 24 T
-
 Oleo-Mac TR111E 6005-9003T
-
 Oleo-Mac TR92E 6004-9004AT
-
 Oleo-Mac TR95E 6004-9032T