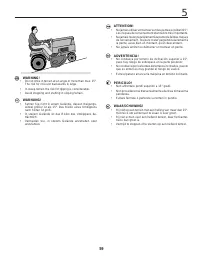
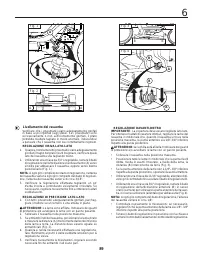
WARNING: Ensure the seat assembly is securely fastened to; the seat pan before occupying or operating tractor.; TO ADJUST SEAT; • Setzen Sie das Pad ein und ziehen Sie den Sitz in; WARNUNG: Stellen Sie sicher, dass die Sitzbaugruppe sicher; EINSTELLEN DES SITZES - Husqvarna TC 38 - Manuale d'uso - Pagina 12


Indice:
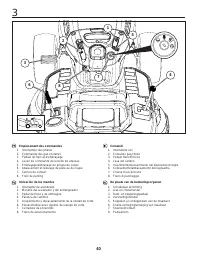
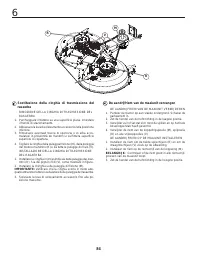
- Pagina 3 – I. ADDESTRAMENTO ALL’USO; Norme Antinfortunistiche; Regole di sicurezza per trattorini da prato
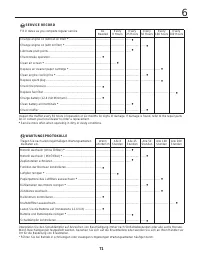
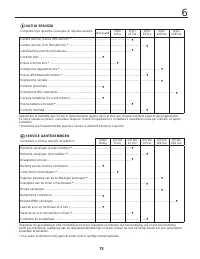
- Pagina 4 – IV. MANUTENZIONE E PERIODI DI INATTIVITA’
- Pagina 8 – EU V
- Pagina 14 – DE STOEL INSTALLEREN; De drie pads worden niet allemaal op hetzelfde; WAARSCHUWING: Zorg ervoor dat de stoel goed vast zit; DE STOEL AFSTELLEN; Zorg ervoor dat de dodemansschakelaar; INSTALLAZIONE DEL SEDILE; • Inserire i cuscini esercitando una leggera pressione; AVVERTENZA: Assicurarsi che il complessivo sedile sia; REGOLAZIONE DEL SEDILE
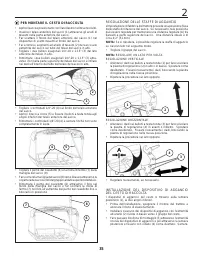
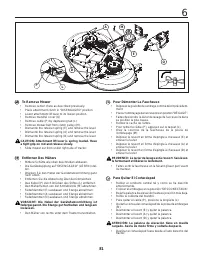
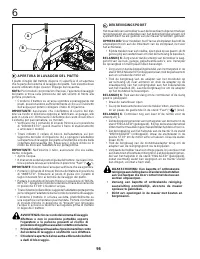
- Pagina 21 – PER MONTARE IL CESTO DI RACCOLTA; REGOLAZIONE DELLE STAFFE DI AGGANCIO
- Pagina 22 – DE GRASCONTAINER MONTEREN
- Pagina 27 – Se usa para desembragar y frenar el tractor y arrancar el motor.
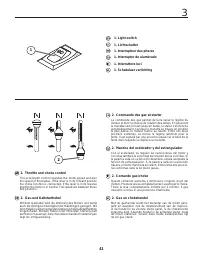
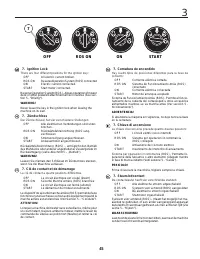
- Pagina 30 – Zündschloss
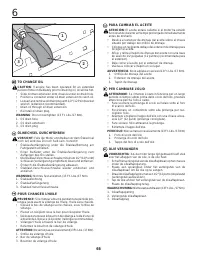
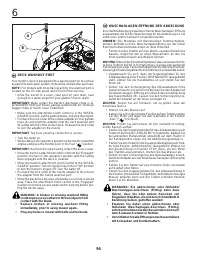
- Pagina 50 – Manutenzione; Prima di ogni impiego:; Onderhoud; Reinigen
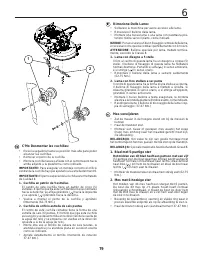
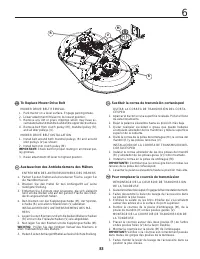
- Pagina 64 – Rimozione Delle Lame:; Lama con disegno a 5 stelle; Mes verwijderen
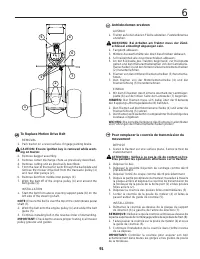
- Pagina 69 – De aandrijfriem van de maaiunit vervangen
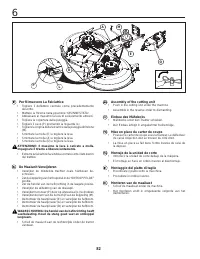
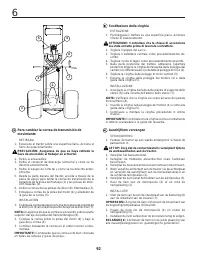
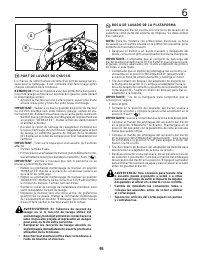
- Pagina 70 – Livellamento del rasaerba; REGOLAZIONE DI PRECISIONE LATO-LATO
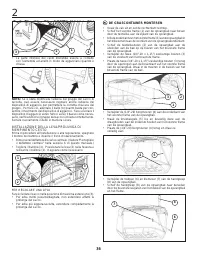
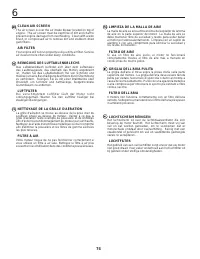
- Pagina 76 – DEKREINIGINGSPOORT; • Vervang een kapotte of ontbrekende reiniging-; APERTURA DI LAVAGGIO DEL PIATTO; IMPORTANTE: Ricontrollare l’area per verificare che sia sgombra.
- Pagina 81 – Al termine della stagione effettuare i seguenti interventi:; Servizio
22
2
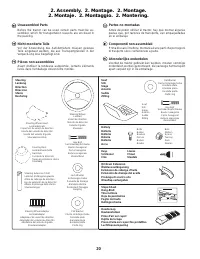
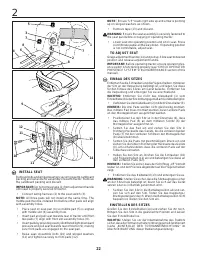
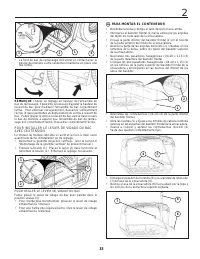
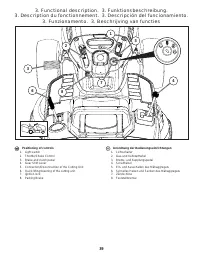
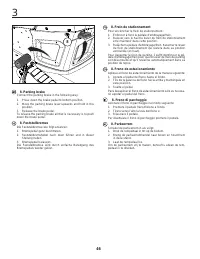
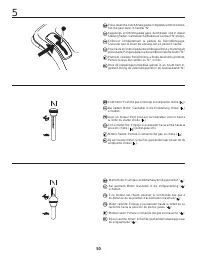
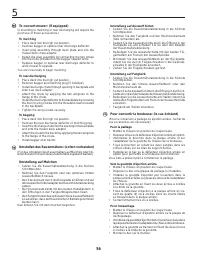
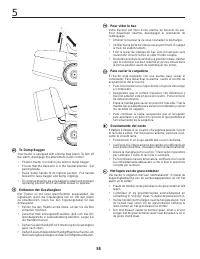
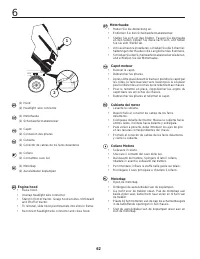
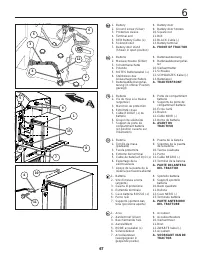
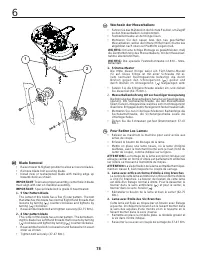
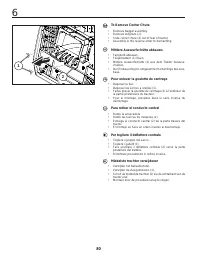
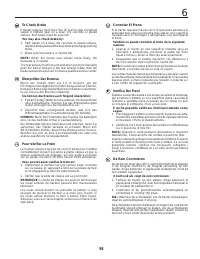
INSTALL
SEAT
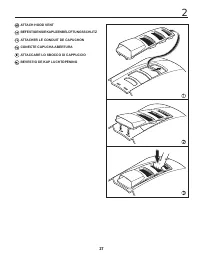
Remove bolts and winged washers se cur ing seat to cardboard
packing and set aside for as sem bly of seat to tractor. Remove
the cardboard packing and discard.
IMPORTANT: Do not remove tape (1) from adjustment handle
until seat is properly secured to tractor.
•
Connect wiring harness (2) to the seat switch (3).
NOTE: All three pads will not install at the same time. The
middle pad must be installed first before other pads will align
with assembly holes.
•
Place seat on seat pan (4) so middle pad (5) is aligned
with middle slot (6) assembly hole.
•
Insert pad and pull seat towards rear of tractor until front
two pads (7) align with front slot assembly holes (8).
•
Insert pads by providing evenly distributed light downward
pressure and pull seat towards rear of tractor (9), making
sure front pads are engaged on the seat pan.
•
Raise seat. Assemble bolts (10) and winged washers
(11) and tighten securely to front pads (12).
NOTE: Ensure “UP” reads right side up and arrow is pointing
up on winged washers as shown.
•
Remove tape (13) and discard.
WARNING: Ensure the seat assembly is securely fastened to
the seat pan before occupying or operating tractor.
•
Lower seat into operating position and sit on seat. Press
clutch/brake pedal all the way down. If operating position
is not comfortable, adjust seat.
TO ADJUST SEAT
Grasp adjustment handle (14) and pull up. Slide seat to desired
position and release adjustment handle.
IMPORTANT: Before operating tractor, ensure operator pres-
ence switch is functioning properly (see “CHECK OPERATOR
PRESENCE SYSTEM” in the MAINTENANCE section of this
manual).
9
10
11
11
13
12
14
2
3
7
7
1
4
8
8
5
6
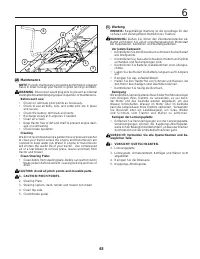
EINBAU DES SITZES
Entfernen Sie die Schrauben und die Flügelscheiben, mit denen
der Sitz an der Verpackung befestigt ist, und legen Sie diese
für den Einbau des Sitzes am Gerät beiseite. Entfernen Sie
die Verpackung und entsorgen Sie sie anschließend.
WICHTIG: Entfernen Sie nicht das Klebeband (1) vom
Einstellhebel, bis der Sitz ordnungsgemäß am Gerät befestigt ist.
•
Verbinden Sie den Kabelbaum (2) mit dem Sitzschalter (3).
HINWEIS: Die drei Pads werden nicht gleichzeitig montiert.
Das mittlere Pad muss montiert werden, bevor andere Pads
an den Montagelöchern ausgerichtet werden.
•
Positionieren Sie den Sitz so in der Sitzschale (4), dass
das mittlere Pad (5) an dem mittleren Schlitz (6) der
Montagelöcher ausgerichtet ist.
• Setzen Sie das Pad ein und ziehen Sie den Sitz in
Richtung Heckseite des Geräts, bis die vorderen beiden
Pads (7) mit den vorderen Schlitzen der Montagelöcher
(8) übereinstimmen.
•
Setzen Sie die Pads mit gleichmäßigem Druck ein und
ziehen Sie die Sitze in Richtung der Heckseite des Geräts
(9), um sicherzustellen, dass die vorderen Pads auf der
Sitzschale einrasten.
•
Heben Sie den Sitz an. Drehen Sie die Schrauben (10)
und Flügelscheiben (11) ein und befestigen Sie diese an
den vorderen Pads (12).
HINWEIS: Stellen Sie sicher, dass der Schriftzug „UP“ korrekt
lesbar ist, und der Pfeil wie abgebildet auf die Flügelscheiben
zeigt.
•
Entfernen Sie das Klebeband (13) und entsorgen Sie es.
WARNUNG: Stellen Sie sicher, dass die Sitzbaugruppe sicher
an der Sitzschale befestigt ist, bevor Sie sich auf das Gerät
setzen oder es in Betrieb genommen wird.
•
Senken Sie den Sitz in die Betriebsposition ab und set-
zen Sie sich auf den Sitz. Treten Sie das Kupplungs-/
Bremspedal ganz durch. Wenn die Betriebsposition nicht
bequem ist, stellen Sie den Sitz ein.
EINSTELLEN DES SITZES
Greifen Sie den Einstellhebel (14) und ziehen Sie ihn hoch.
Bringen Sie den Sitz in die gewünschte Position und lassen
Sie den Einstellhebel los.
WICHTIG: Stellen Sie vor der Inbetriebnahme des Traktors
sicher, dass der Totmannschalter ordnungsgemäß funktioniert
(siehe „KONTROLLE DER TOTMANNEINRICHTUNG“ im
Abschnitt WARTUNG dieser Bedienungsanleitung).
"Caricamento dell'istruzione" significa che è necessario attendere finché il file non è caricato e pronto per la lettura online. Alcune istruzioni sono molto grandi e il tempo di caricamento dipende dalla velocità della tua connessione a Internet.
Sommario
11 I. ADDESTRAMENTO ALL’USO • Studiare attentamente le istruzioni. Acquisire dimesti- chezza con i comandi e conoscere a fondo l’uso corretto dell’equipaggiamento. • Non consentire mai l’uso dei trattorini tosaerba ai bam- bini né agli adulti che non abbiano dimestichezza con le istruzioni sull’uso....
12 • Disinnestare la trasmissione del moto agli accessori du rante il trasporto del macchinario oppure quando non è in uso. • Spegnere il motore e disinnestare la motorizzazione degli accessori nei seguenti casi:- prima di fare rifornimento;- prima di smontare il contenitore dell’erba tagliata;- pri...
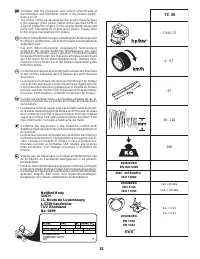
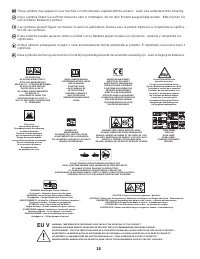
18 These symbols may appear on your machine or in the literature supplied with the product. Learn and understand their meaning. Diese Symbole finden Sie auf Ihrer Maschine oder in Unterlagen, die mit dem Produkt ausgehändigt wurden. Bitte machen Sie sich mit deren Bedeutung vertraut. Ces symboles pe...