Husqvarna TS 348XD - Manuale d'uso - Pagina 62


Indice:
- Pagina 3 – I. ADDESTRAMENTO ALL’USO; Norme Antinfortunistiche; Regole di sicurezza per trattorini da prato; ATTENZIONE
- Pagina 4 – IV. MANUTENZIONE E PERIODI DI INATTIVITA’
- Pagina 15 – achteruitrijden
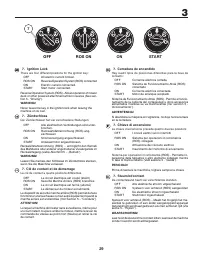
- Pagina 19 – Zündschloss
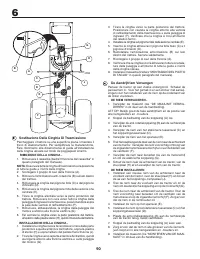
- Pagina 30 – SPURGO DELLA TRASMISSIONE; TRANSMISSIE ONTLUCHTEN
- Pagina 34 – Non falciare in retromarcia
- Pagina 53 – Messen
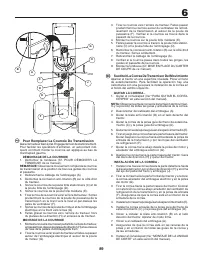
- Pagina 56 – SMONTAGGIO DELLA CINGHIA DI TRASMISSIONE
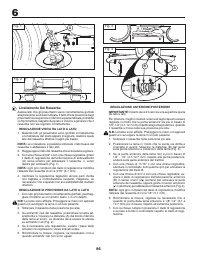
- Pagina 57 – Livellamento Del Rasaerba; REGOLAZIONE VISIVA DA LATO A LATO
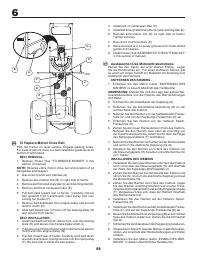
- Pagina 60 – Sostituzione Della Cinghia Di Trasmissione; RIMOZIONE DELLA CINGHIA -; De Aandrijfriem Vervangen; DE RIEM VERWIJDEREN -
- Pagina 69 – Onderhoud; Al termine della stagione effettuare i seguenti interventi:; Servizio
92
6
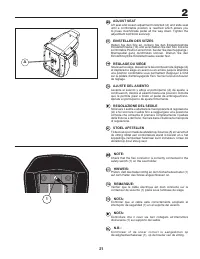
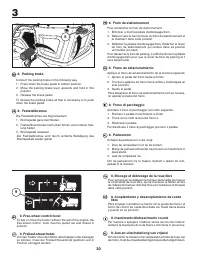
WASCHANLAGEN-ÖFFNUNG DES
SCHNEIDWERKS
Das Schneidwerk Ihres Traktors ist außen mit einer Waschanlagen-
Öffnung ausgestattet, die Teil der Waschanlage für das Schnei-
dwerk ist. Sie sollte nach jedem Gebrauch verwendet werden.
• Fahren Sie den Traktor auf eine ebene, saubere Stelle Ihres
Rasens, möglichst nah an einen Wasserhahn, an den Sie
Ihren Gartenschlauch anschließen können
WICHTIG:
Stellen Sie sicher, dass der Auswurfsammler des
Traktors von Ihrem Haus, Ihrer Garage, geparkten Autos usw.
weg zeigt. Entfernen Sie den Grasfänger-Sammelbehälter oder
die Mulchabdeckung, falls montiert.
• Vergewissern Sie sich, dass der Kupplungshebel für das
Anbauwerkzeug in der Position „DISENGAGED“ (ausgeklinkt)
steht. Ziehen Sie die Handbremse an und stellen Sie den
Motor ab.
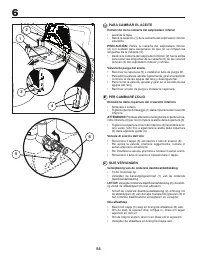
• Ziehen Sie den Sicherungsring des Düsenadapters am Gar-
tenschlauch (A) zurück, und drücken Sie den Adapter auf die
Waschanlagen-Öffnung (B) am linken Ende des Mähdecks.
Lassen Sie den Sicherungsring los, damit der Adapter an
der Düse verriegelt ist.
WICHTIG:
Ziehen Sie am Schlauch, um zu prüfen, dass der
Anschluss fest ist.
• Drehen Sie das Wasser auf.
• Setzen Sie sich in die Fahrerposition auf den Traktor, starten
Sie den Motor neu und stellen Sie den Gashebel in die Posi-
tion „Fast“ "
"(Schnell).
WICHTIG:
Prüfen Sie jetzt erneut, dass sich niemand im umlieg-
enden Bereich aufhält.
• Stellen Sie den Hebel für die Zusatzgerätekupplung am
Traktor in die Position „Engaged“ (eingeklinkt). Bleiben Sie
bei aktiviertem Mähdeck unbedingt auf dem Traktor in der
Fahrerposition sitzen, bis das Schneidwerk gereinigt ist.
• Stellen Sie den Hebel für die Zusatzgerätekupplung am Trak-
tor in die Position „DISENGAGED“ (ausgeklinkt). Drehen Sie
den Zündschlüssel in Position STOP (Aus), um den Motor
des Traktors auszuschalten. Drehen Sie das Wasser ab.
• Ziehen Sie den Sicherungsring des Düsenadapters zurück,
damit der Adapter aus der Düsenwaschanlagen-Öffnung frei
kommt.
• Fahren Sie den Traktor auf eine trockene Stelle, am besten
auf Asphalt oder Beton. Stellen Sie den Hebel für die
Zusatzgerätekupplung in die Position „ENGAGED“ (eingek-
linkt), damit überschüssiges Wasser ablaufen kann und der
Traktor schneller trocknet, bevor Sie ihn abstellen.
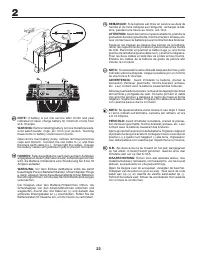
WARNUNG: Ein gebrochener oder fehlender
Waschanlagen-Anschluss (Fitting) kann dazu
führen, dass Sie oder andere Personen von
fliegenden Objekten, die mit dem Schneidblatt in
Berührung kamen, getroffen werden.
• Ersetzen Sie daher einen gebrochenen oder
fehlenden Waschanlagen-Anschluss (Fitting)
sofort und nehmen Sie den Mäher erst nach dem
Austausch wieder in Betrieb.
• Verschließen Sie alle Öffnungen des Mähers mit
Schrauben und Kontermuttern.
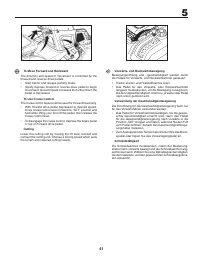
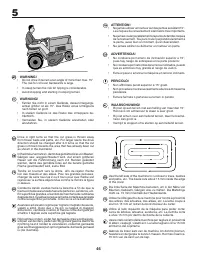
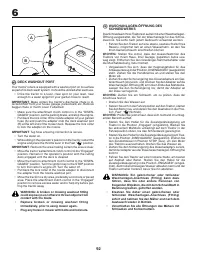
DECK WASHOUT PORT
Your tractor’s deck is equipped with a washout port on its surface
as part of its deck wash system. It should be utilized after each use.
• Drive the tractor to a level, clear spot on your lawn, near
enough to a water spigot for your garden hose to reach.
IMPORTANT:
Make certain the tractor’s discharge chute is di-
rected AWAY from your house, garage, parked cars, etc. Remove
bagger chute or mulch cover if attached.
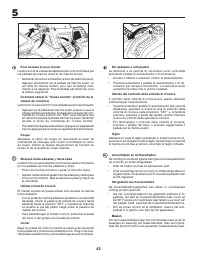
• Make sure the attachment clutch control is in the “DIS EN-
GAGED” position, set the parking brake, and stop the engine.
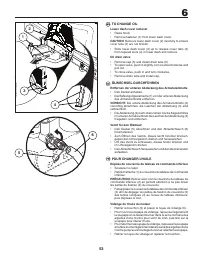
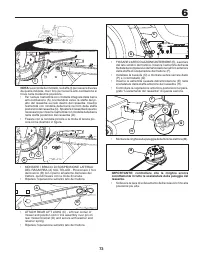
• Pull back the lock collar of the nozzle adapter on your garden
hose (A) and push the adapter onto the deck washout port
(B) at the left end of the mower deck. Release the lock collar
to lock the adapter on the nozzle.
IMPORTANT:
Tug hose ensuring connection is secure.
• Turn the water on.
• While sitting in the operator’s position on the tractor, restart the
engine and place the throttle lever in the Fast "
" position.
IMPORTANT
: Recheck the area making certain the area is clear.
• Move the tractor’s attachment clutch control to the “Engaged”
position. Remain in the operator’s position with the cutting
deck engaged until the deck is cleaned.
• Move the tractor’s attachment clutch control to the “DIS EN-
GAGED” position. Turn the ignition key to the STOP position
to turn the tractor’s engine off. Turn the water off.
• Pull back the lock collar of the nozzle adapter to disconnect
the adapter from the nozzle washout port.
• Move the tractor to a dry area, preferably a concrete or paved
area. Place the attachment clutch control in the “Engaged”
position to remove excess water and to help dry before put-
ting the tractor away.
WARNING: A broken or missing washout fitting
could expose you or others to thrown objects from
contact with the blade.
• Replace broken or missing washout fitting
immediately, prior to using mower again.
• Plug any holes in mower with bolts and locknuts.
A
B
"Caricamento dell'istruzione" significa che è necessario attendere finché il file non è caricato e pronto per la lettura online. Alcune istruzioni sono molto grandi e il tempo di caricamento dipende dalla velocità della tua connessione a Internet.
Sommario
11 I. ADDESTRAMENTO ALL’USO • Studiare attentamente le istruzioni. Acquisire dimesti- chezza con i comandi e conoscere a fondo l’uso corretto dell’equipaggiamento. • Non consentire mai l’uso dei trattorini tosaerba ai bam- bini né agli adulti che non abbiano dimestichezza con le istruzioni sull’uso....
12 • Disinnestare la trasmissione del moto agli accessori du rante il trasporto del macchinario oppure quando non è in uso. • Spegnere il motore e disinnestare la motorizzazione degli accessori nei seguenti casi:- prima di fare rifornimento;- prima di smontare il contenitore dell’erba tagliata;- pri...
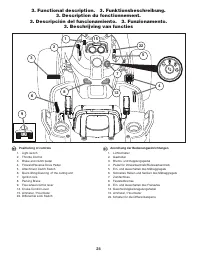
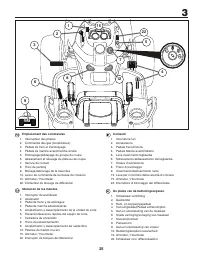
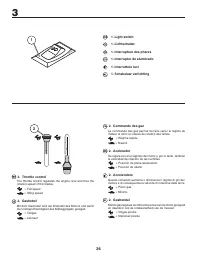
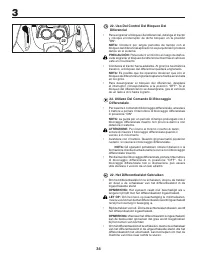
25 Emplacement des commandes 1. Interrupteur des phares2. Commande des gaz (Accélérateur)3. Pédale de frein et d'embrayage 4. Pédale de marche avant/marche arrière5. Embrayage/débrayage du groupe de coupe6. Abaissement et relevage du plate au de coupe. 7. Serrure de contact8. Frein de parking9. Bloc...