Pagina 1 - Auf der Webseite www.
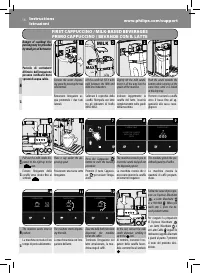
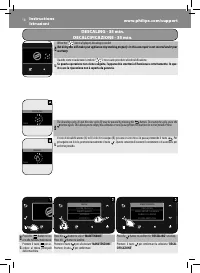
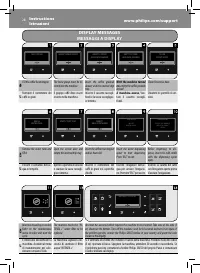
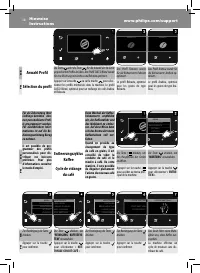
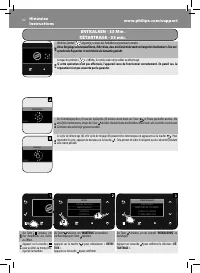
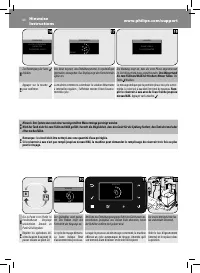
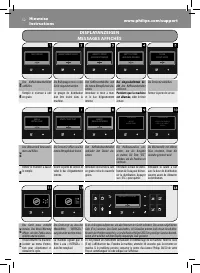
IT Benvenuto nel mondo Philips Saeco! Registratevi sul sito WWW.PHILIPS.COM/WELCOME per rice- vere consigli e aggiornamenti sulla manutenzione. In questo libretto sono riportate le istruzioni in breve per il corretto funzionamento della macchina. Nell’imballo della macchina potete trovare un CD cont...
Pagina 6 - Smaltimento
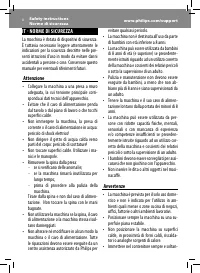
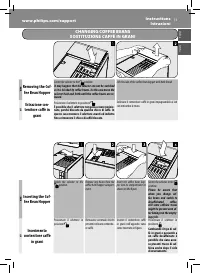
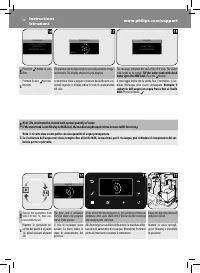
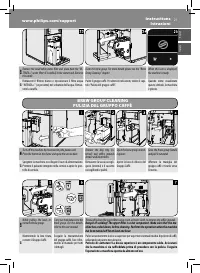
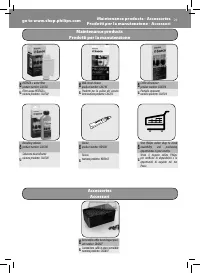
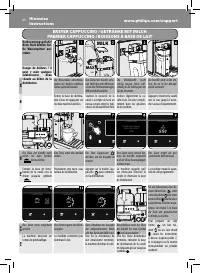
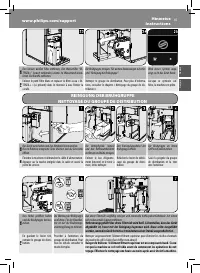
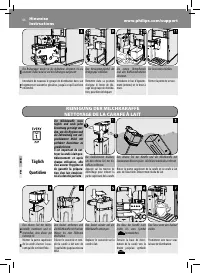
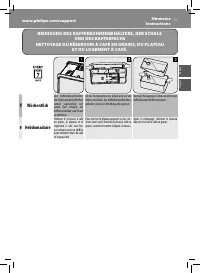
9 Safety instructionsNorme di sicurezza www.philips.com/support English Italiano to caff è in grani. Caff è in polvere, solubile, nonché altri oggetti, se inseriti nel conteni-tore caff è in grani, possono danneggiare la macchina. • Lasciare raff reddare la macchina prima di inserire o rimuovere qua...
Pagina 7 - FIRST INSTALLATION; MAX
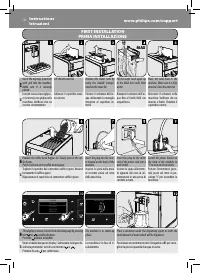
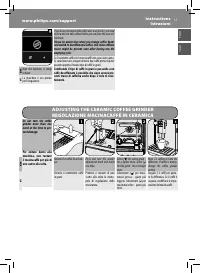
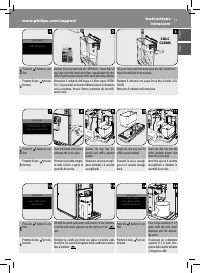
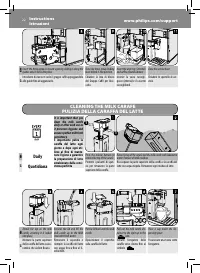
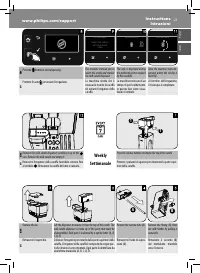
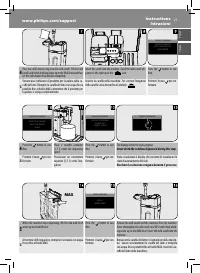
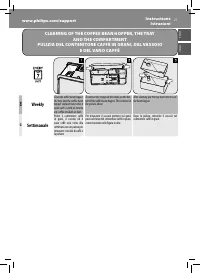
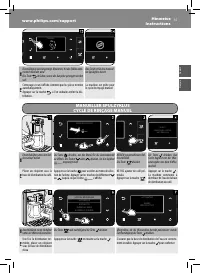
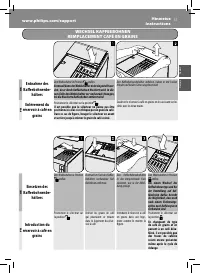
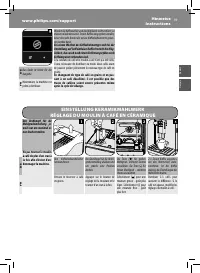
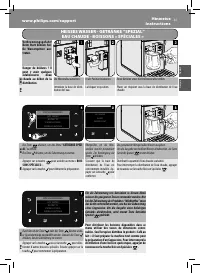
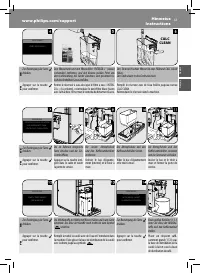
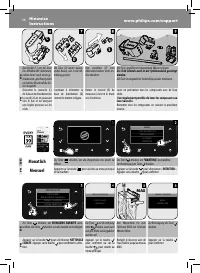
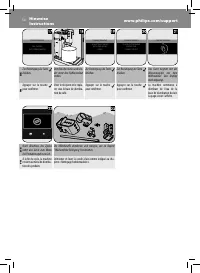
10 InstructionsIstruzioni www.philips.com/support EN Insert the drip tray (external) with grill into the machine. Make sure it is correctly placed. Lift the left outer lid. Remove the water tank by using the handle incorpo-rated on the inner lid. Fill the water tank again up to the MAX level with fr...
Pagina 8 - MANUAL RINSE CYCLE
11 www.philips.com/support Instructions Istruzioni English Italiano EN At the end, place a container under the water dispensing spout. Press the and then the button. Check that the water dispensing spout is correctly installed. Press the button to confi rm. IT Al termine, posizionare un contenitore ...
Pagina 9 - OK; MY FAVOURITE ESPRESSO
12 InstructionsIstruzioni www.philips.com/support ESPRESSO / COFFEE BREWING EROGAZIONE ESPRESSO / CAFFÈ EN At the end of the operation, remove and empty the con-tainer. Repeat steps 5 to 8 until the water tank is empty and the no water warning sign appears. At the end, fi ll the water tank again up ...
Pagina 10 - CHANGING COFFEE BEANS; Switch the selector to the
13 www.philips.com/support Instructions Istruzioni English Italiano CHANGING COFFEE BEANS SOSTITUZIONE CAFFÈ IN GRANI EN Removing the Cof- fee Bean Hopper Switch the selector to the position. It may happen that the selector can not be switched as it is blocked by coff ee beans. In this case move the...
Pagina 11 - Coff ee Emptying; MAINTENANCE; mento caff è; ZIONE
14 InstructionsIstruzioni www.philips.com/support EN Profi le Selection Press the button or the button to select the profi les stored in the machine. The SAECO Blend profi le, optimized for an Arabica and Robusta blend. The Robusta profi le, opti-mized for Robusta coff ee beans. The Arabica profi le...
Pagina 12 - ADJUSTING THE CERAMIC COFFEE GRINDER
15 www.philips.com/support Instructions Istruzioni English Italiano EN Now the machine is ready to brew. IT La macchina è ora pronta per l’erogazione. ADJUSTING THE CERAMIC COFFEE GRINDER REGOLAZIONE MACINACAFFÈ IN CERAMICA EN Remove the coff ee bean hop-per. Press and turn the grinder adjustment kn...
Pagina 13 - PRIMO CAPPUCCINO / BEVANDE CON IL LATTE; Press the Cappuccino; MILK; , a Latte Macchiato
16 InstructionsIstruzioni www.philips.com/support FIRST CAPPUCCINO / MILK-BASED BEVERAGES PRIMO CAPPUCCINO / BEVANDE CON IL LATTE EN Remove the water dispens-ing spout by pressing the two side buttons. Lift the carafe lid. Fill it with milk between the MIN and MAX level indicators. Slightly tilt the...
Pagina 14 - HOT WATER - “SPECIAL” BEVERAGES; SPECIAL BEVERAGES; button
17 www.philips.com/support Instructions Istruzioni English Italiano HOT WATER - “SPECIAL” BEVERAGES ACQUA CALDA - Bevande “SPECIAL” EN Insert the water dispensing spout. Fix it in place. Place a container under the hot water dispensing spout. IT Inserire l'erogatore dell'ac-qua. Bloccarlo in posizio...
Pagina 16 - CALC
19 www.philips.com/support Instructions Istruzioni English Italiano EN Press the button to con-fi rm. Remove the water tank and the “INTENZA+” water fi lter (if any) and insert the small white fi lter supplied with the ma-chine. Pour the entire content of the Saeco descaling solution. Fill up the ta...
Pagina 17 - Fill the water tank with fresh; Riempire il; Premere il tasto .
20 InstructionsIstruzioni www.philips.com/support EN Repeat the operations from step 8 to step 16, then con-tinue with step 20. The rinse cycle is activated. The bar shows the progress status of the process. At the end of the descaling process, the machine performs an automatic rinse cycle. Wait unt...
Pagina 18 - BREW GROUP CLEANING
21 www.philips.com/support Instructions Istruzioni English Italiano EN Remove the small white water fi lter and place back the “IN-TENZA+” water fi lter (if installed) in the water tank. Remove the carafe. Clean the brew group. For more details please see the “Brew Group Cleaning” chapter. When this...
Pagina 19 - Close the service door.
22 InstructionsIstruzioni www.philips.com/support EN Attach the top on the milk carafe, ensuring it is locked into place. Remove the lid and fi ll the milk carafe up to the MAX level with fresh water. Put the lid back onto the milk carafe. Pull out the milk carafe dis-penser to the right up to the i...
Pagina 20 - Weekly; Press the release buttons to remove the top of the carafe.; Settimanale; Press the button to start dispensing.; Rimuovere il coperchio.
23 www.philips.com/support Instructions Istruzioni English Italiano EN Reinsert the milk carafe dispenser, scrolling it up to the icon. Remove the milk carafe and empty it. Weekly Press the release buttons to remove the top of the carafe. IT Reinserire l’erogatore della caraff a facendolo scorrere f...
Pagina 21 - You can also clean these parts in the dishwasher.; Monthly; Mensile; MANUTENZIONE; CARAFE CLEANING
24 InstructionsIstruzioni www.philips.com/support EN Detach the lid (C) from the milk carafe dispenser by pushing downwards while slightly pressing on the sides. Disassemble further the dis-penser (D) as shown in the fi gure. Remove the fi tting (E) from the milk frother by pulling it outwards. Clea...
Pagina 22 - The display shows the cycle progress.; Non bere la soluzione erogata durante il processo.
25 www.philips.com/support Instructions Istruzioni English Italiano EN Pour one milk cleaner bag into the milk carafe. Fill the milk carafe with fresh drinking water up to the MAX level and then let the milk cleaner bag dissolve completely. Insert the carafe into the machine. Scroll the milk carafe ...
Pagina 24 - CLEANING OF THE COFFEE BEAN HOPPER, THE TRAY
27 www.philips.com/support Instructions Istruzioni English Italiano CLEANING OF THE COFFEE BEAN HOPPER, THE TRAY AND THE COMPARTMENT PULIZIA DEL CONTENITORE CAFFÈ IN GRANI, DEL VASSOIO E DEL VANO CAFFÈ EN Weekly Clean the coff ee bean hopper, the tray and the coff ee bean hopper compartment once a w...
Pagina 25 - Fill the coff ee bean hopper.; A macchina accesa
28 InstructionsIstruzioni www.philips.com/support DISPLAY MESSAGES MESSAGGI A DISPLAY INSERT BREW GROUP EMPTY DRIP TRAY INSERT BEAN CONTAINER HO T W A T ER INSER T W A T ER S P OU T INSERT COFFEE GROUNDS DRAWER EMPTY COFFEE GROUNDS DRAWER CA PP UCCINO INSER T T HE CARAFE W I T H T HE S P OU T O P EN...
Pagina 26 - Maintenance products
29 go to www.shop.philips.com Maintenance products - Accessories Prodotti per la manutenzione - Accessori Maintenance products Prodotti per la manutenzione Accessories Accessori EN Milk circuit cleaner product number: CA6705 IT Prodotto per la pulizia del circuito latte numero prodotto: CA6705 EN Gr...