Philips HD8855/01 - Istruzioni
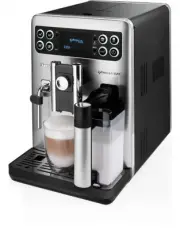
Guida rapida Philips HD8855/01


Sommario
EN Congratulations on choosing perfect espresso and cappuccino! This home barista is your gateway to a world of professionally prepared Italian coffee specialties.Treat your senses to perfect espresso and cappuccino by Philips Saeco – certi fi ed by Italian Tasters – Centro Studi As- saggiatori, Ita...
9 www.philips.com/support Safety instructionsNorme di sicurezza IT - Norme di sicurezza La macchina è dotata di dispositivi di sicurezza. Tuttavia è necessario legge-re attentamente le indicazioni per la sicurezza descritte nelle presenti istru-zioni d’uso in modo da evitare danni accidentali a pers...
10 www.philips.com/support InstructionsIstruzioni HEATING UP… RINSING STOP H 2 O MAX EN Attach the external drip tray. Open the lid and remove the water tank by the handle. Rinse and fi ll the water tank with fresh water. Make sure the dispensing spout is in correct position. Open the lid of the cof...
Philips Istruzioni
-
 Philips STH3020/70
Manuale d'uso
Philips STH3020/70
Manuale d'uso
-
 Philips STH3010/30
Manuale d'uso
Philips STH3010/30
Manuale d'uso
-
 Philips STH1010/10
Manuale d'uso
Philips STH1010/10
Manuale d'uso
-
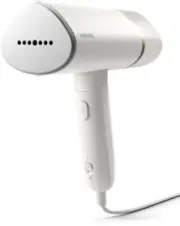 Philips STH3020/16
Manuale d'uso
Philips STH3020/16
Manuale d'uso
-
 Philips STH3000/26R1
Manuale d'uso
Philips STH3000/26R1
Manuale d'uso
-
 Philips STH3000/26
Manuale d'uso
Philips STH3000/26
Manuale d'uso
-
 Philips 0366.00B.77C
Manuale d'uso
Philips 0366.00B.77C
Manuale d'uso
-
 Philips HD6324/90
Manuale d'uso
Philips HD6324/90
Manuale d'uso
-
 Philips GC6612/30
Manuale d'uso
Philips GC6612/30
Manuale d'uso
-
 Philips GC6842/36
Manuale d'uso
Philips GC6842/36
Manuale d'uso
-
 Philips GC6730/36R1
Manuale d'uso
Philips GC6730/36R1
Manuale d'uso
-
 Philips GC6704/36R1
Manuale d'uso
Philips GC6704/36R1
Manuale d'uso
-
 Philips GC6802/36R1
Manuale d'uso
Philips GC6802/36R1
Manuale d'uso
-
 Philips GC6740/36R1
Manuale d'uso
Philips GC6740/36R1
Manuale d'uso
-
 Philips FC6090/01
Manuale d'uso
Philips FC6090/01
Manuale d'uso
-
 Philips GC6420/02
Manuale d'uso
Philips GC6420/02
Manuale d'uso
-
 Philips GC6268/22
Manuale d'uso
Philips GC6268/22
Manuale d'uso
-
 Philips HD6152/16
Manuale d'uso
Philips HD6152/16
Manuale d'uso
-
 Philips HD6132/10
Manuale d'uso
Philips HD6132/10
Manuale d'uso
-
 Philips GC6611/30
Manuale d'uso
Philips GC6611/30
Manuale d'uso