Philips HD8768/01 - Istruzioni

Guida rapida Philips HD8768/01
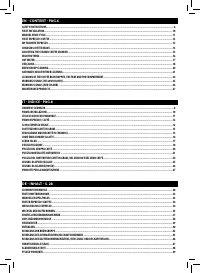
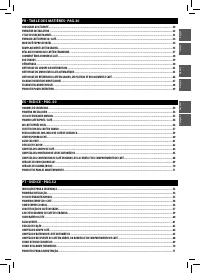


Sommario
EN Welcome to Philips Saeco! Register on WWW.PHILIPS.COM/WELCOME and you will receive tips and updates on how to take care of your machine. This booklet contains quick instructions on how to operate your machine properly. The machine package includes a CD with the entire manual in your lan-guage. Pu...
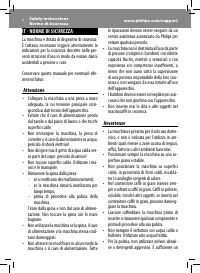
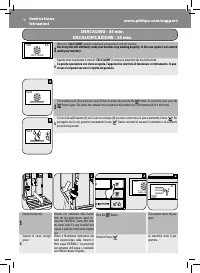
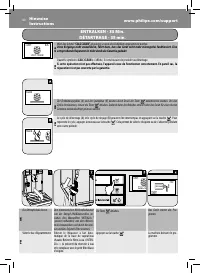
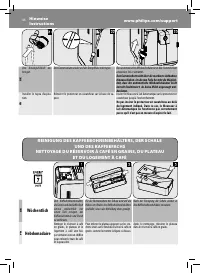
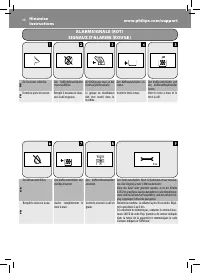
9 Safety instructionsNorme di sicurezza www.philips.com/support English Italiano panno morbido inumidito con acqua. • Eff ettuare la decalcifi cazione della macchina regolarmente. Sarà la macchina a segnalare quando è necessario procedere alla decalci-fi cazione. Se questa operazione non viene esegu...
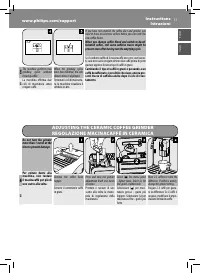
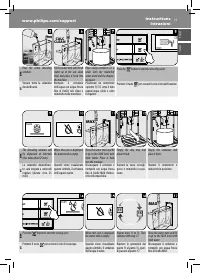
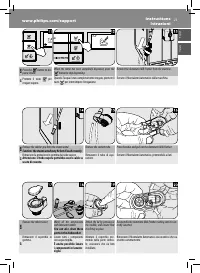
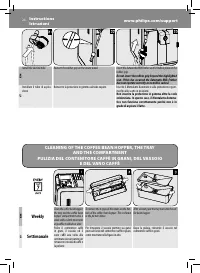
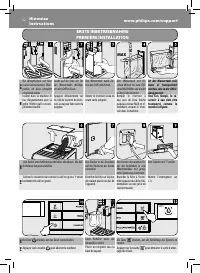
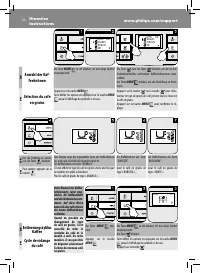
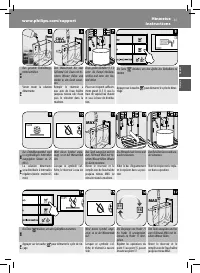
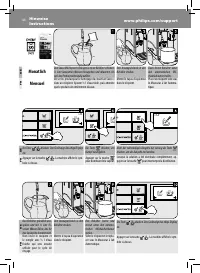
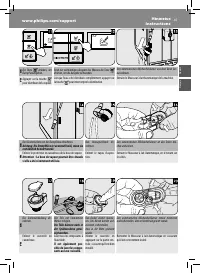
10 InstructionsIstruzioni www.philips.com/support EN Insert the drip tray with grill into the machine. Make sure it is fully inserted. Push gently on the edge of the water tank door to re-lease the handgrip. Remove the water tank by pulling the handgrip. Rinse and fi ll the water tank with fresh wat...
Other Philips Altri Manuals
-
 Philips STH3020/70
Manuale d'uso
Philips STH3020/70
Manuale d'uso
-
 Philips STH3010/30
Manuale d'uso
Philips STH3010/30
Manuale d'uso
-
 Philips STH1010/10
Manuale d'uso
Philips STH1010/10
Manuale d'uso
-
 Philips STH3020/16
Manuale d'uso
Philips STH3020/16
Manuale d'uso
-
 Philips STH3000/26R1
Manuale d'uso
Philips STH3000/26R1
Manuale d'uso
-
 Philips STH3000/26
Manuale d'uso
Philips STH3000/26
Manuale d'uso
-
 Philips 0366.00B.77C
Manuale d'uso
Philips 0366.00B.77C
Manuale d'uso
-
 Philips HD6324/90
Manuale d'uso
Philips HD6324/90
Manuale d'uso
-
 Philips GC6612/30
Manuale d'uso
Philips GC6612/30
Manuale d'uso
-
 Philips GC6842/36
Manuale d'uso
Philips GC6842/36
Manuale d'uso
-
 Philips GC6730/36R1
Manuale d'uso
Philips GC6730/36R1
Manuale d'uso
-
 Philips GC6704/36R1
Manuale d'uso
Philips GC6704/36R1
Manuale d'uso
-
 Philips GC6802/36R1
Manuale d'uso
Philips GC6802/36R1
Manuale d'uso
-
 Philips GC6740/36R1
Manuale d'uso
Philips GC6740/36R1
Manuale d'uso
-
 Philips FC6090/01
Manuale d'uso
Philips FC6090/01
Manuale d'uso
-
 Philips GC6420/02
Manuale d'uso
Philips GC6420/02
Manuale d'uso
-
 Philips GC6268/22
Manuale d'uso
Philips GC6268/22
Manuale d'uso
-
 Philips HD6152/16
Manuale d'uso
Philips HD6152/16
Manuale d'uso
-
 Philips HD6132/10
Manuale d'uso
Philips HD6132/10
Manuale d'uso
-
 Philips GC6611/30
Manuale d'uso
Philips GC6611/30
Manuale d'uso