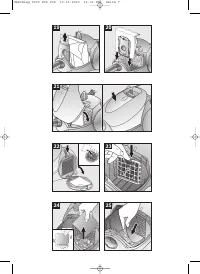
Bosch BSN 2100 RU - Manuale d'uso
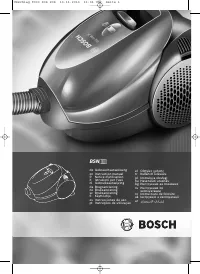
Aspirapolvere Bosch BSN 2100 RU – Manuale d'uso, leggi gratuitamente online in formato PDF. Speriamo che questo ti aiuti a risolvere eventuali dubbi. Se hai ulteriori domande, contattaci tramite il modulo di contatto.


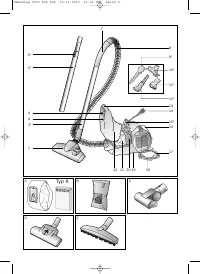
BSN
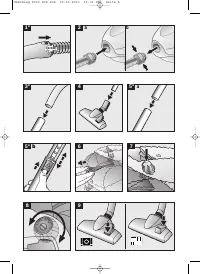
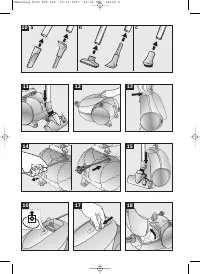
de Gebrauchsanweisung
en Instruction manual
fr Notice d'utilisation
it
Istruzioni per l'uso
nl Gebruiksaanwijzing
da Brugsanvisning
no Bruksanvisning
sv Bruksanvisning
fi
Käyttöohje
es Instrucciones de uso
pt Instruções de utilização
el
Οδηγίες χρήσης
tr
Kullanım kılavuzu
pl
Instrukcja obsługi
hu
Használati utasítás
bg
Инструкция за ползване
ru
Инструкция по
эксплуатации
ro
Instrucţiuni de folosire
uk
Інструкція з експлуатації
ar
Umschlag 9000 806 206 13.11.2013 11:31 Uhr Seite 1
"Caricamento dell'istruzione" significa che è necessario attendere finché il file non è caricato e pronto per la lettura online. Alcune istruzioni sono molto grandi e il tempo di caricamento dipende dalla velocità della tua connessione a Internet.